News

Peter Harrison, Talk Wargaming Review : Eastern Front Razed Buildings October 7, 2015 22:57

 Thanks to Peter Harrison for reviewing Charlie Foxtrot Models. I have added Pete to the list of facebook pages I follow. Lots of good advice and impartial observations across the wargames spectrum, presented in a very professional manner.

Guest Tutorial " How to make MDF Buildings" by Matt Owens-Smith Part 2 October 5, 2015 23:20

Good chum and expert modeller / painter Matt Owens-Smith posted this blog entry on his site www.wargamestableblogspot.co.uk

Once more, my thanks to Matt for giving permission to "pinch" wholesale. His step by step assembly and painting of the "Farmhouse" is well worth a read for modellers with any level of experience.

How to make MDF buildings - Part 2

This post is all about painting the recently constructed MDF building from Charlie Foxtrot Models to a decent gaming standard.

The building has been textured with a magnolia coloured masonry paint, then it's been lightly sprayed with Warlord Dunkelgelb, although any cream or light brown would suffice. You can see that the spray has speckled the roof but that's okay as it will need tidying up before it is painted anyway.

The first highlight has been applied using Foundry Base Sand shade 10A. It's been stippled on to the walls. (stipple = use a large, old brush and load with paint as if you were heavy dry-brushing, but instead of brushing, you tap the end of the brush on to the wall. If you're not sure then practice on a piece of card first.)

Next is VMC Dark Sand, again stippled to allow some of the colours beneath to show through - but only a little.

Finally I've applied white. Go easy here as white can be quite harsh; it's easy to add more if you prefer a lighter finish.

A close up of the white finish on the render (it's actually a little lighter for real!)

The doors, window frames and shutters are given a light dusting of black spray - just enough to prime the surface otherwise the 'raw' MDF really soaks up the paint. I use tiny dots of blu-tak to hold them in place.

A base coat of Foundry Forest Green shade 26A, followed by the Mid colour 26B.

Then a final highlight with Forest Green Light 26C.


Now on to the doors - I've painted a series of fake panels or planks using the Foundry Spearshaft triad. The front door is painted in a similar style to the window frames and shutters

The back door (on the right) has a Z frame and again is painted using the Spearshaft triad.


The backs of the shutters will not be seen, whether the shutters are open or closed. The interior (i.e. the backs) of the window frames are given a basic mid brown colour.

Now it's time to sort out the roof. There are various ways to paint the roof but here I present what I think is the quickest and easiest method for the standard MDF engraved tiles. Colin sells some brilliant tiling sheets in a variety of styles. Hopefully I'll do an example with some of those in the future.

The main roof - re-touched (by brush) to remove the speckles of the base colours - ready for the tiling effect. The chimney pot is painted in Foundry Brick Red shade 59A.

Select two or three suitable tile colours, e.g. natural looking greys. I've chosen the shade colour for Foundry Slate Grey 32A, Stone 57A and Granite 31A. Now simply select a colour and lightly 'colour in' a selection of tiles across the roof, about a dozen tiles per side, per colour is fine. It's a bit like dry-brushing but keep the paint within the edges of each tile. Then repeat for each of the other tile colours. Remember to do a few short sections of the ridge too.


The final stage of tile painting is to take a mid grey colour, I used Foundry Slate Grey mid 32B, and very lightly (with a large, soft brush) apply a dry-brushed highlight to the entire roof. Do this VERY lightly as you can always apply a second or third highlight.


Here's the same effects applied to the smaller extension roof.

That's the painting pretty much complete for the basic model. Next is the final assembly. The pic below shows the window sills, and the loft window, glued in position (only some of the CFM range come with two part window frames). Let these dry fully before continuing.

Next glue in the frames, then glue the shutters around the windows.

Some Window Tips
  • Make sure you use a glue that dries completely clear as it's bound to leak a little around the frame edges.
  • Always dry fit the window frames before applying the glue just to make sure they fit properly. If not then trim the frame or aperture with a modelling knife.
  • Apply a small 'bead' of glue to the inside of the window aperture on the building, then let it go slightly tacky as that improves it's 'grab' ability. This means the window won't fall out when you let go!?
  • Shutters - the kit will have enough left and right shutters - make sure you fit them in matching pairs!
So, there you have it. The basic building is done and ready for battle!


Some more tips
  • Consider using DIY/hardware store paint tester pots as base coats for walls - much cheaper than Foundry, VMC, etc.
  • When applying the highlights go easy as you can always apply more paint but it's jolly tricky to remove it.
But why stop there? Part 3 will look at basing and finishing touches such as flooring, mantle pieces, etc. Oh, and I haven't forgotten the log store.

Again, hope that's useful.

Chris Harris: thetabletopwargamers :video review October 5, 2015 00:07

Chris Harris has posted a very positive review of Charlie Foxtrot Models "Banque De France". Please view and see how my kits are presented.

Chris has a wealth of other wargaming reviews and is well worth following in you tube.

Thanks Chris.


New Releases: "Double Dial Counters" for Kings of War and 28mm 1:56 Eastern Front "Rural House 3" September 28, 2015 11:24

Having just played my first few games of Kings of War by Mantic Games, I have been so excited about getting out my fully painted Warhammer Fantasy Battles armies out of the cabinets and using them again. I have only invested in a few packs of mantic models just to "fill out the corners", the "Fleabags" are just so nice.

I have designed a double dial counter which can be customised to suit your basing style and decorated with amy specific "spares" from your bits box. Sold in sets of 8 the dials can be quickly assembled and immediatly used plain. The double dials can them be decorated as part of your army project.

Please note, the "Double Dials" are my own design and have not been made in association with Mantic Games.


With the footprint of last weeks release "Razed 1" comes Eastern Front "Rural House 3". "Rural House 3" has even more authentic features than other models in this collection and would be seen as a higher status dwelling. The model has ornately carved window and front door surrounds. A half hipped roof with waney edged cardboard planking is also included (the plastic angle piece running along the apex, like most of my kits is also included) The carved corner boards, although decorative, are to prevent damage to the dwelling from horse and cart accidents!


Guest Tutorial " How to make MDF Buildings" by Matt Owens-Smith September 23, 2015 18:32

Good chum and expert modeller / painter Matt Owens-Smith posted this blog entry on his site www.wargamestableblogspot.co.uk

Thanks to Matt for giving permission to "pinch" wholesale.

How to make MDF buildings - Part 1

This post aims to explain how to go about constructing MDF buildings, specifically those from Charlie Foxtrot Models. In subsequent posts I'll go on to look at how to paint them too.

I decided to do this after chatting to a few people at Colours. Some seemed a bit put off from making and painting them, but if you can build and paint figures ok then buildings should be no problem.

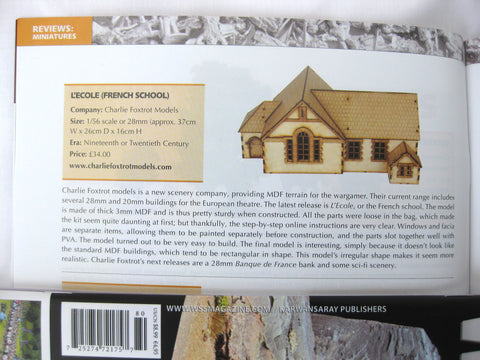
My first example will be one of Colin's lovely farmhouse kits. Here's the official picture.

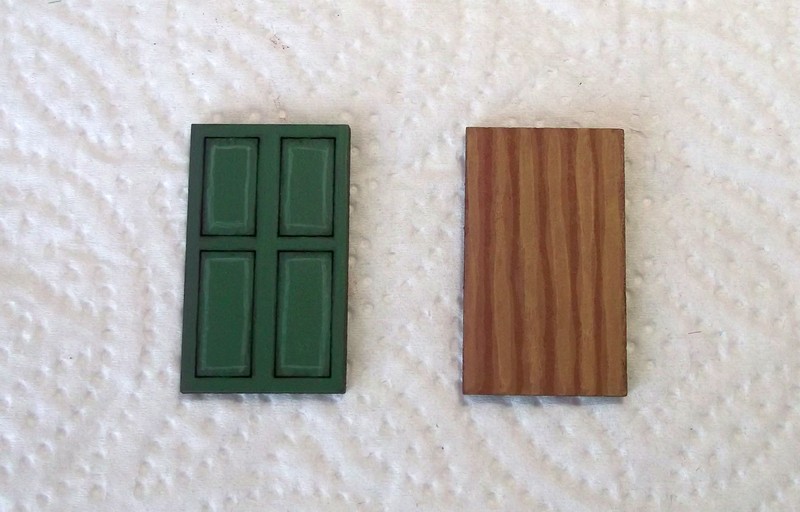
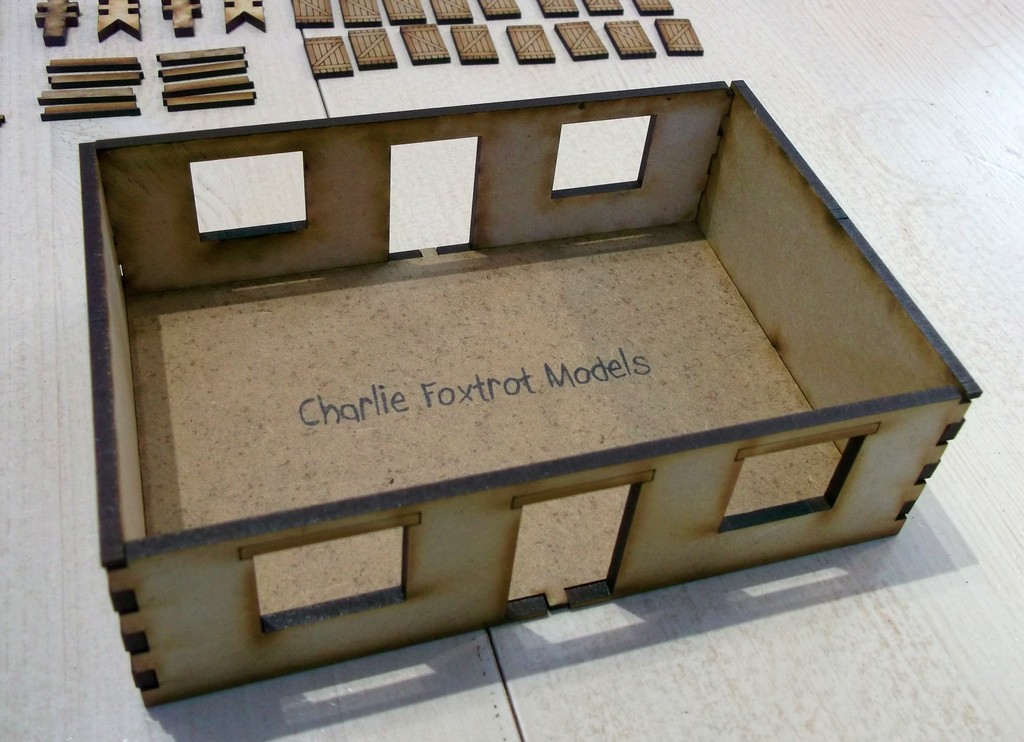
Here are the components.

I usually begin by building the ground floor. A very important point to bear in mind is to always 'dry fit' any components before gluing. That is, check out how well they fit and how it looks by holding the pieces together - or maybe use some blu-tak. It's a good way to check that it all fits and looks right.

Here's the ground floor.

It all fits nicely, so it's time to get out the glue. Use good quality wood glue as it's stronger, doesn't shrink and dries clear. I normally use Evo-Stik Interior Wood Adhesive. Blob some on to a palette and then use a cocktail stick to apply the glue neatly. Less is more, so to speak, as the joins generally fit flush you really only need a small amount of glue. Wipe off any excess that seeps out of the joints using a damp tissue.

Another tip - Colin puts plenty of pictures of the finished article on his web site, usually from a variety of angles, so use those pics to help you figure out what goes where if you're not sure.

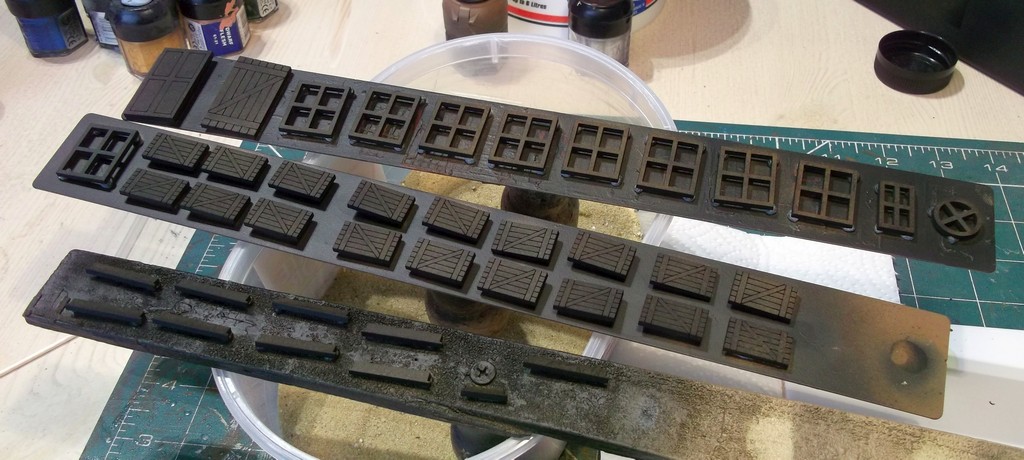
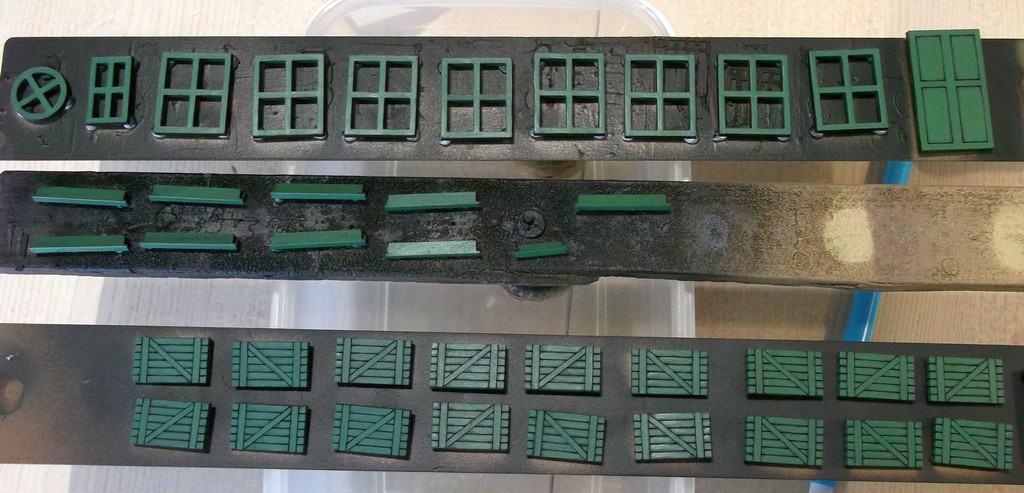
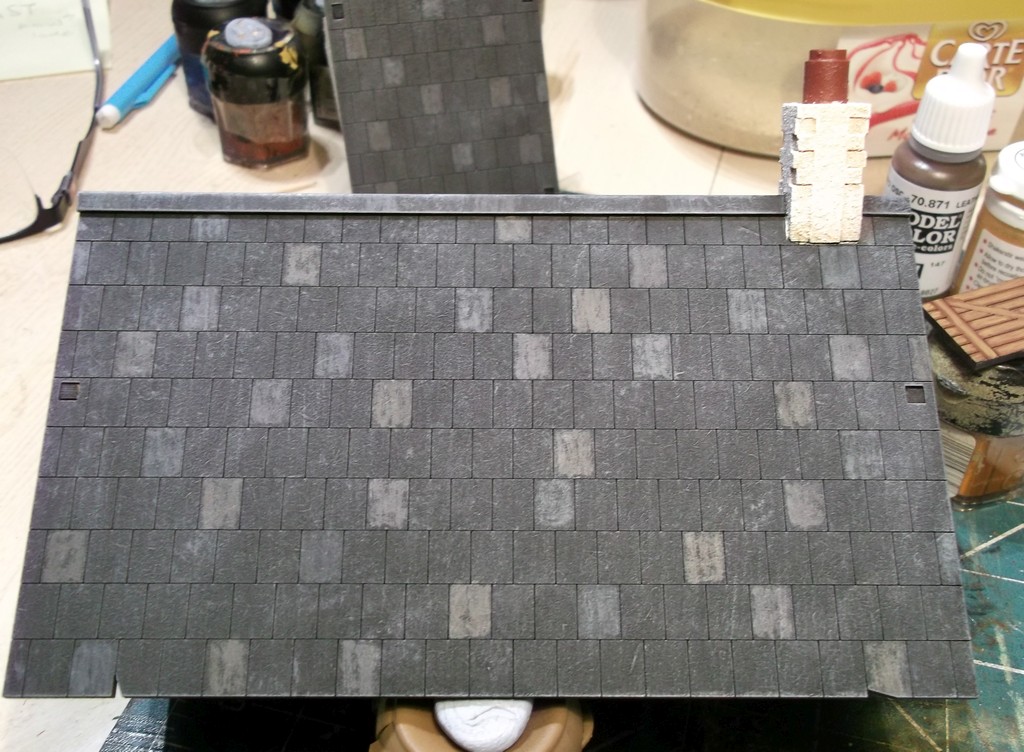
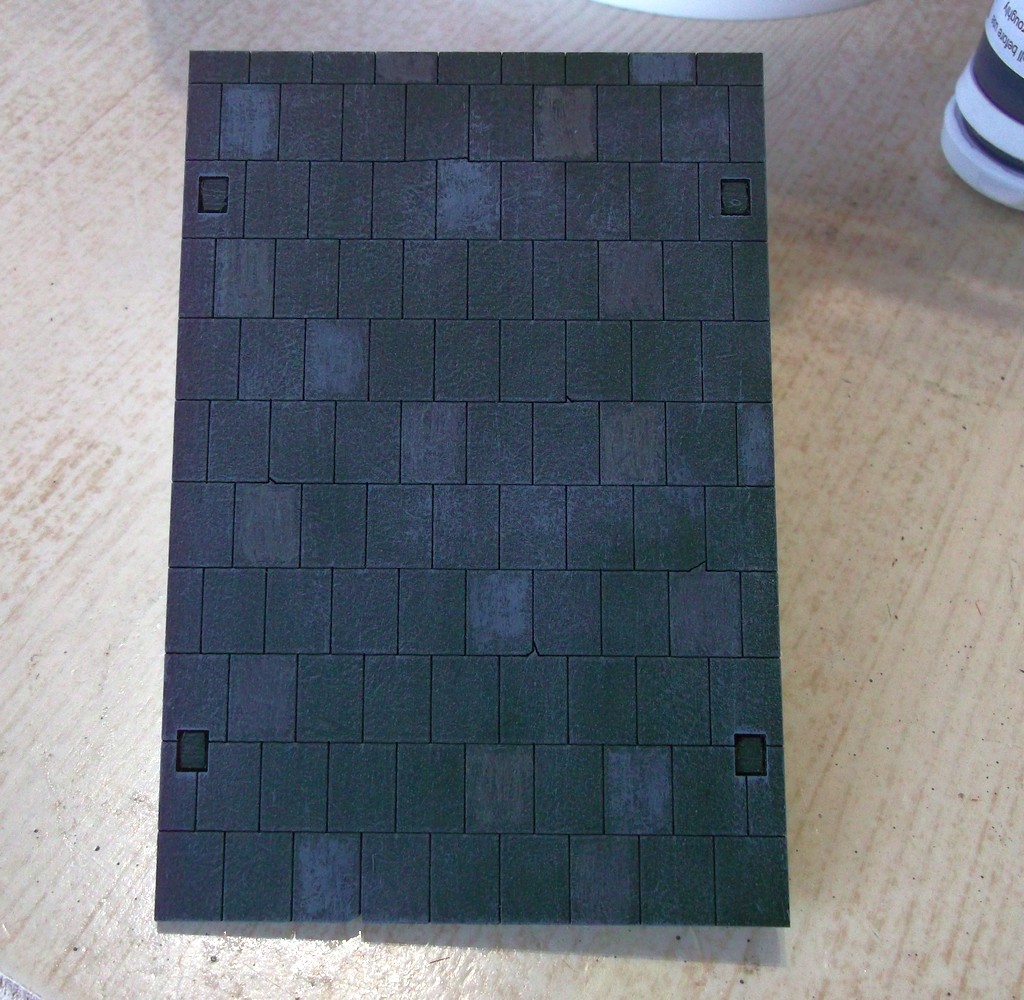
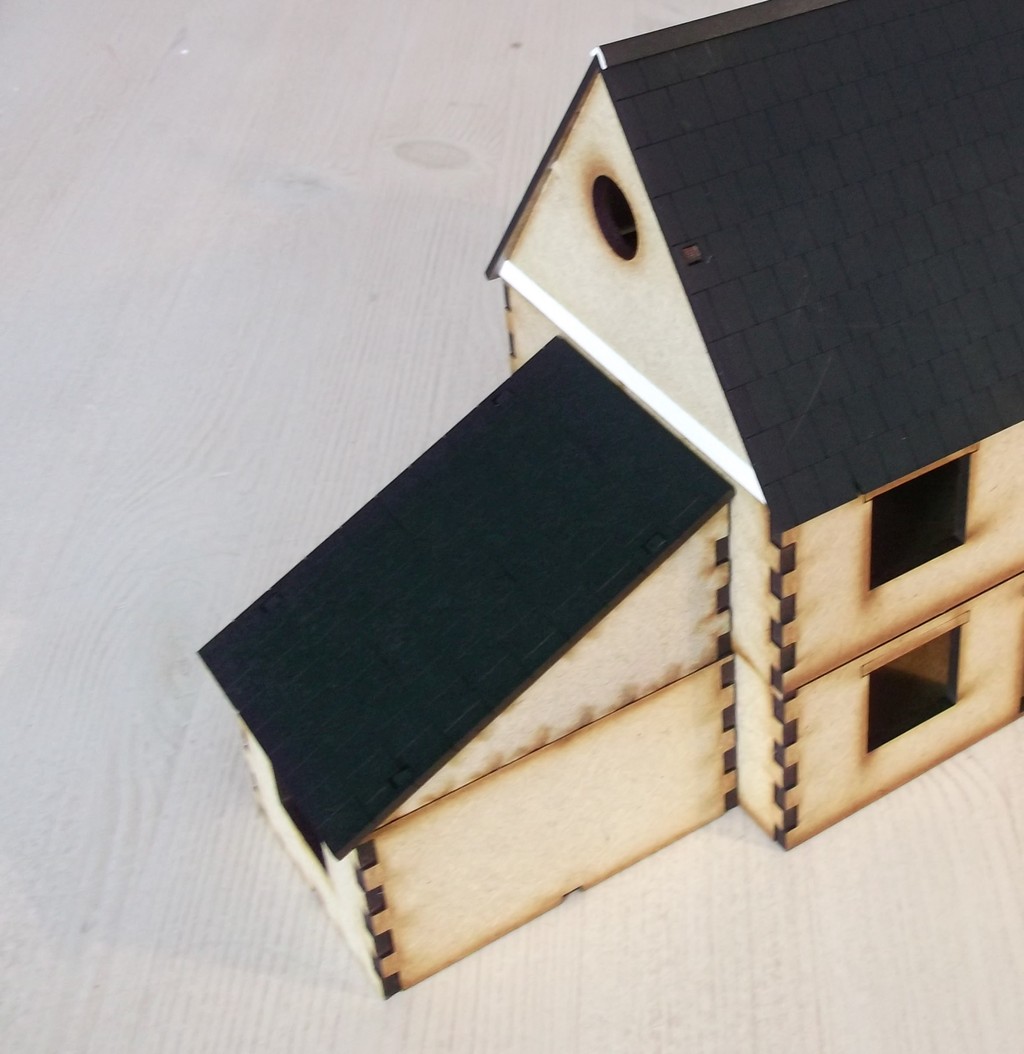
Roof: I suggest that you spray the tiled roof sections black or dark grey before you assemble them.

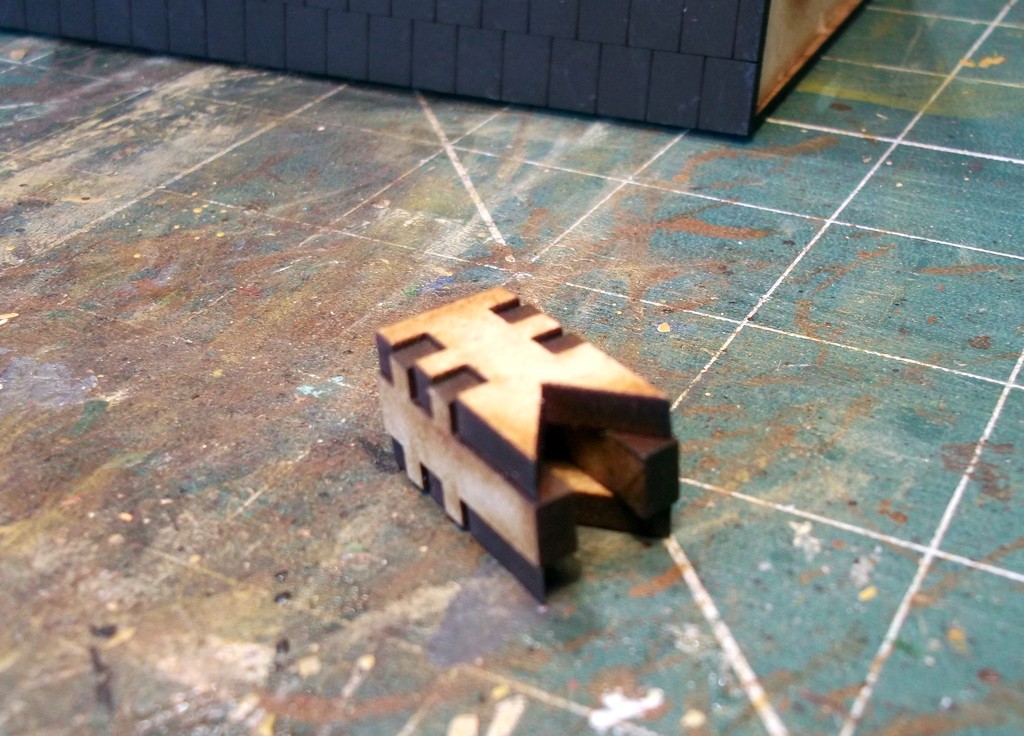
The upper floor also has some guide pieces to help it fit snugly on to the ground floor. They stop the upper floor sliding around too easily.

The tip here is to glue them in the corners (aligned to the edge of the base, inside the walls) then place the upper floor on top of the lower and give it a tiny wiggle. Then they'll fit neatly but with enough 'tolerance' to make it easy to lift on or off. The roof has similar pieces that glue on the inside of the gable ends.

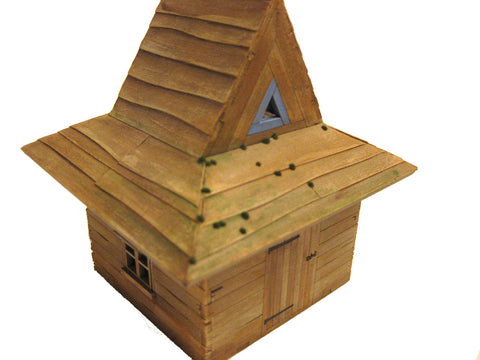
Chimney: The instructions show how these pieces fit together to make the chimney stack - hopefully you can see it's very straightforward. You'll need to shave some of the components to make them fit the angle of the roof.


The kit includes a length of plastic pipe that you can cut to make a chimney pot but I've found that cyclindrical lego 'bricks' give a good result for much less effort. Also included is a length of plastic strip to act as ridge tiles for the roof. I've glued on the chimney and trimmed the plastic to fit either side.

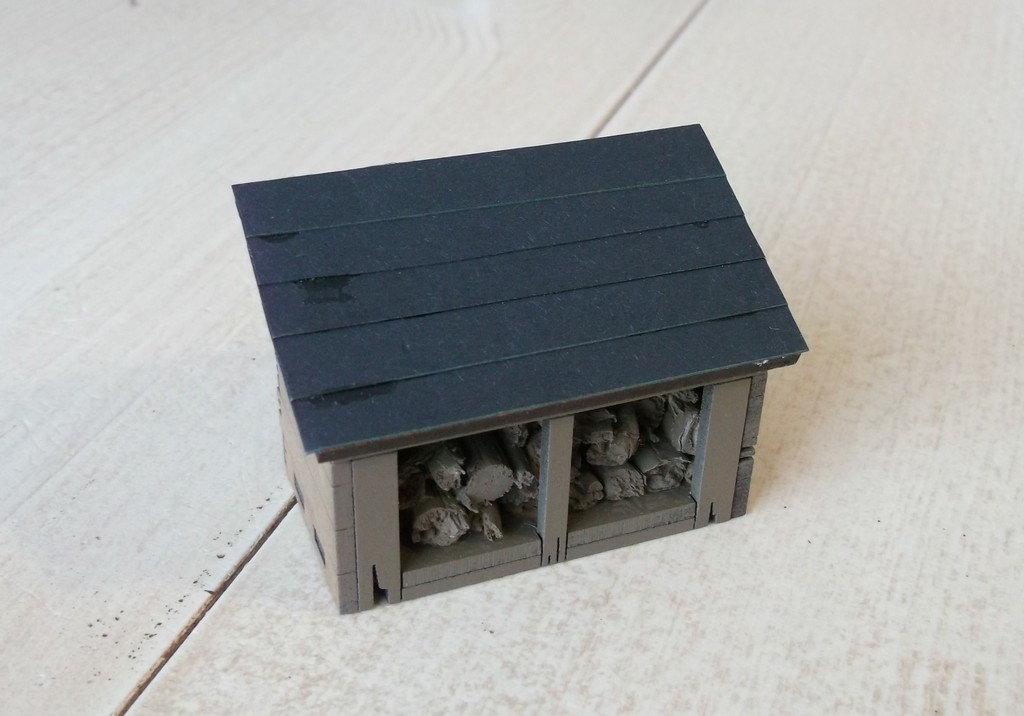
To add further interest I've built a CFM log store. A tip here is to leave off the roof so that you can glue 'logs' in place. The logs themselves are simply bits of dried twig snapped to the right length.


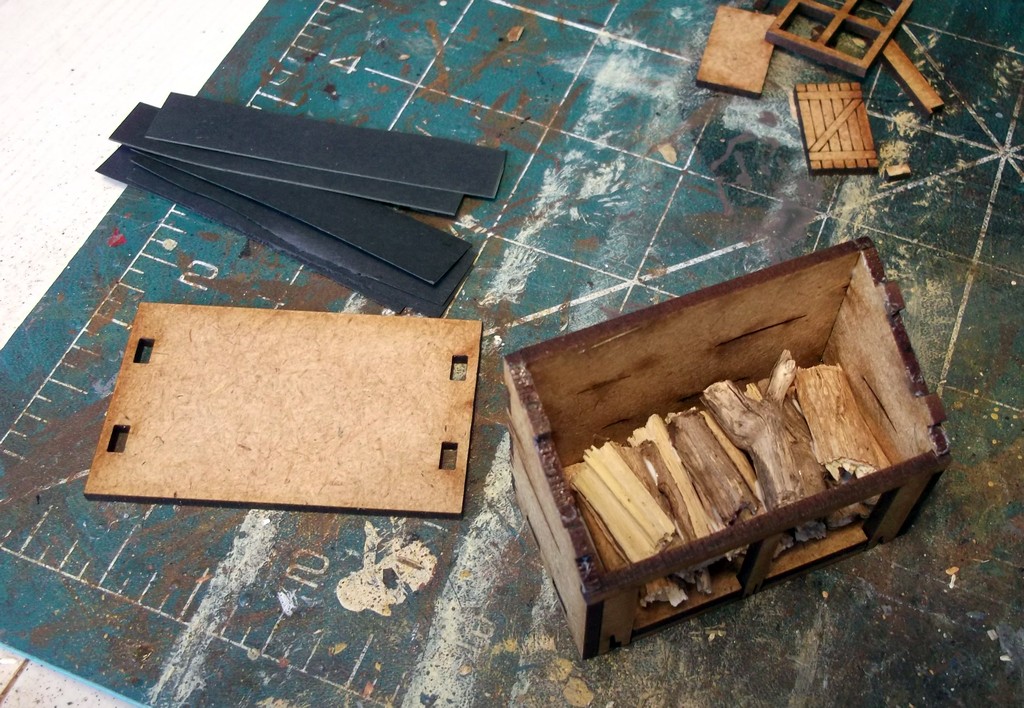
With the roof; made by overlapping strips of card.

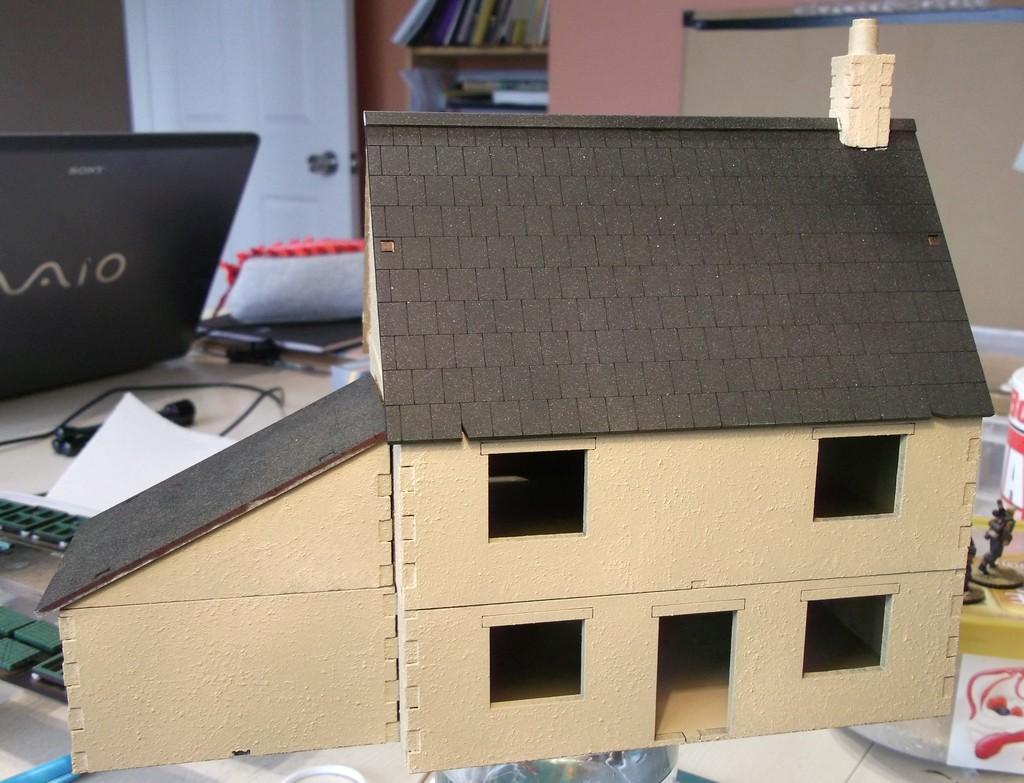
Fore even more variety I've added a CFM extension.

It's been built in exactly the same way as the main building.

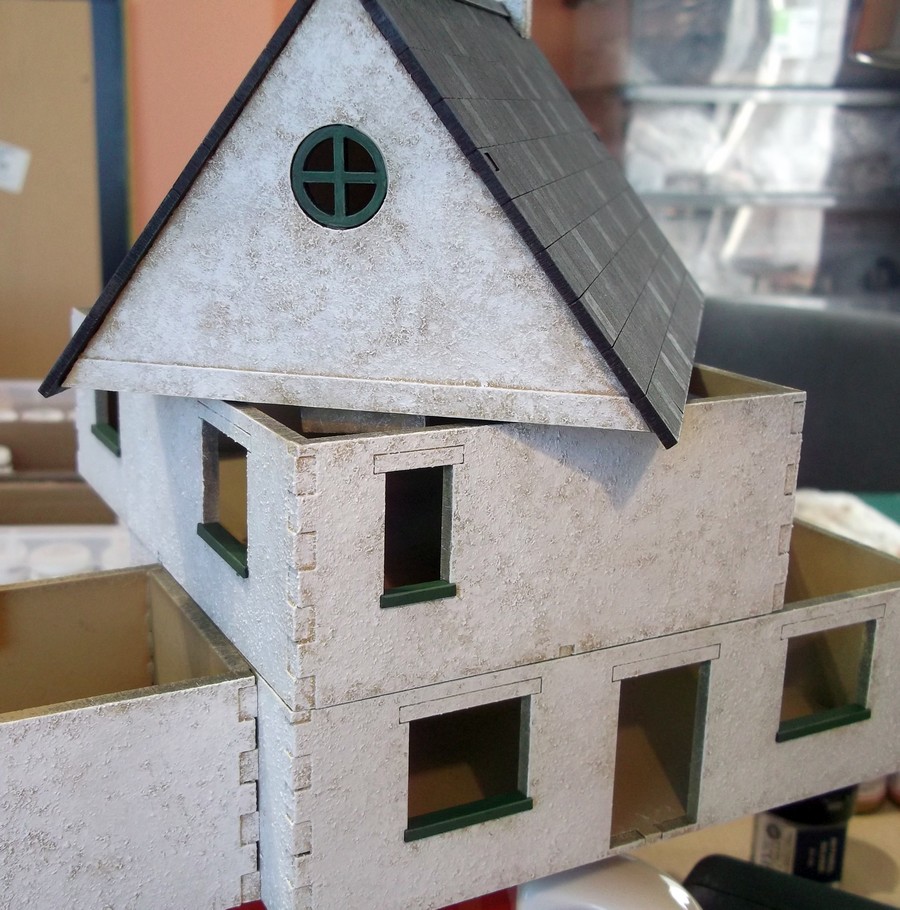
The next stage is to apply the texture to give the walls a roungh, plastered or rendered appearance. I use cheap masonry paint - be sure to avoid the smooth types as you need a little grittiness to give the right texture. For extra texture you can mix in fine sand. Other gamers use something called Chinchilla Sand - basically a fine grained grit. (The lady in the local pet store gave me a very odd look when I asked for it, so I left. I'll stick to masonry paint!)

Warning! Make sure you keep all of the door and window apertures completely clear of any paint or texture otherwise it becomes a real bother to fit the doors and windows later!

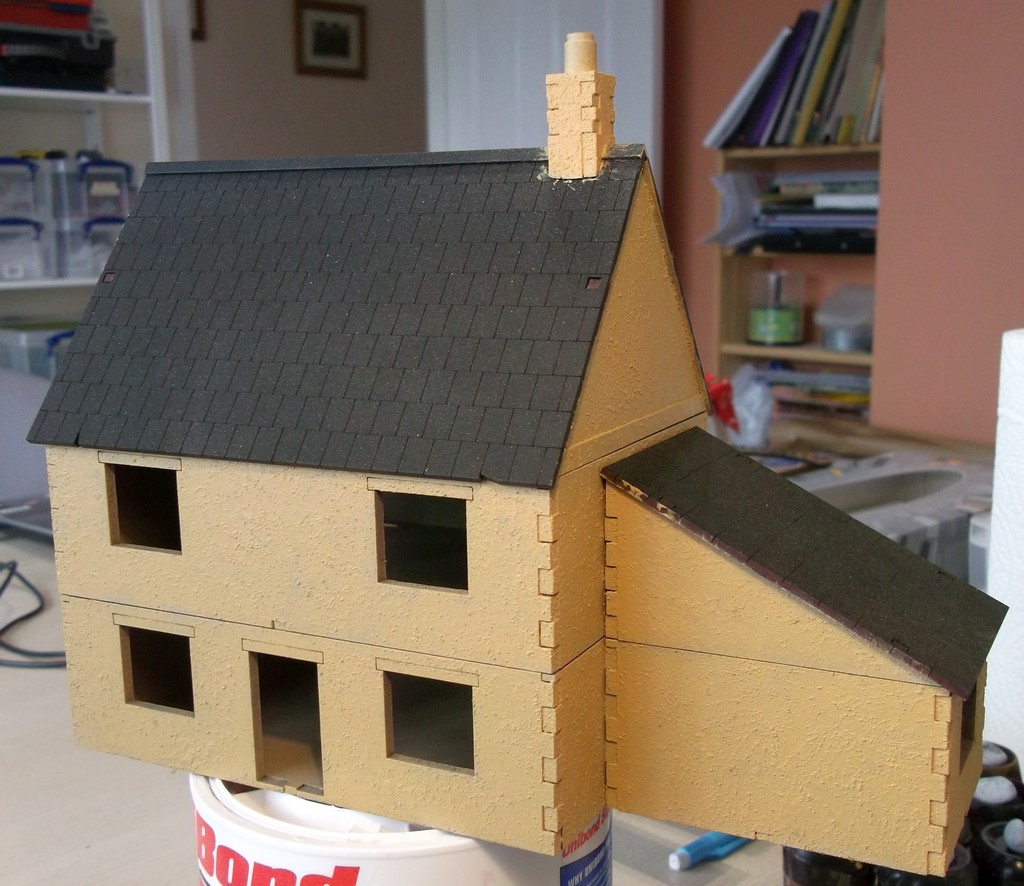
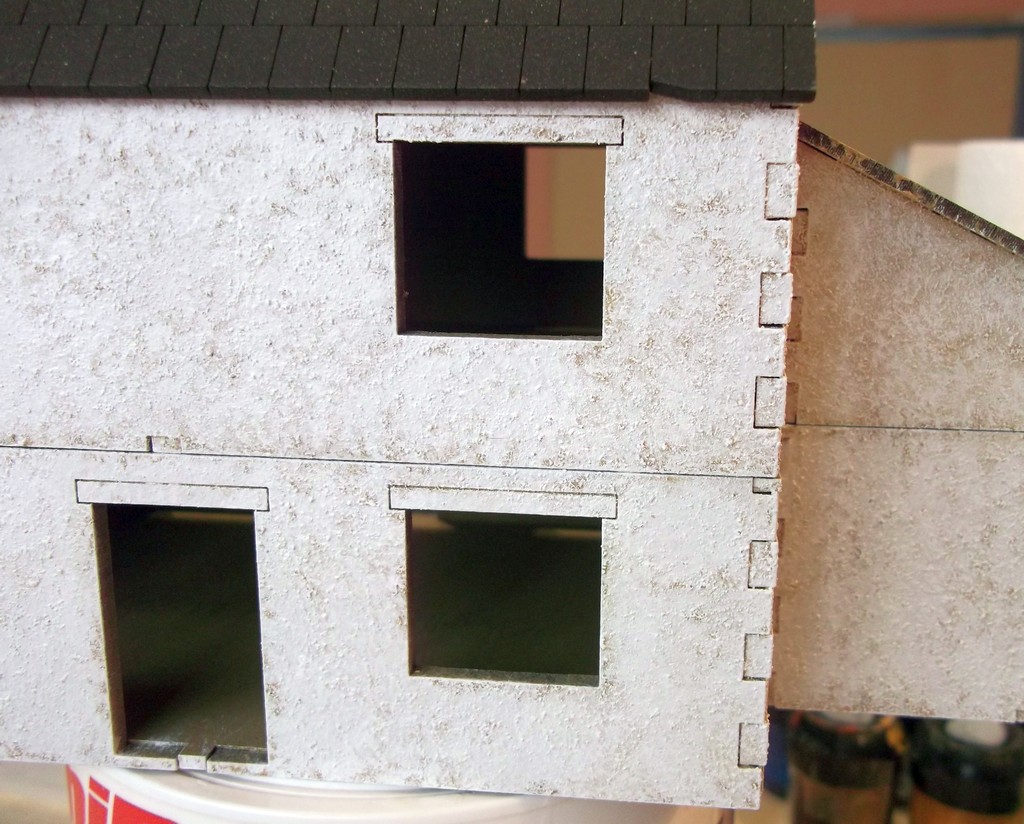
Some close up pictures of the texture.


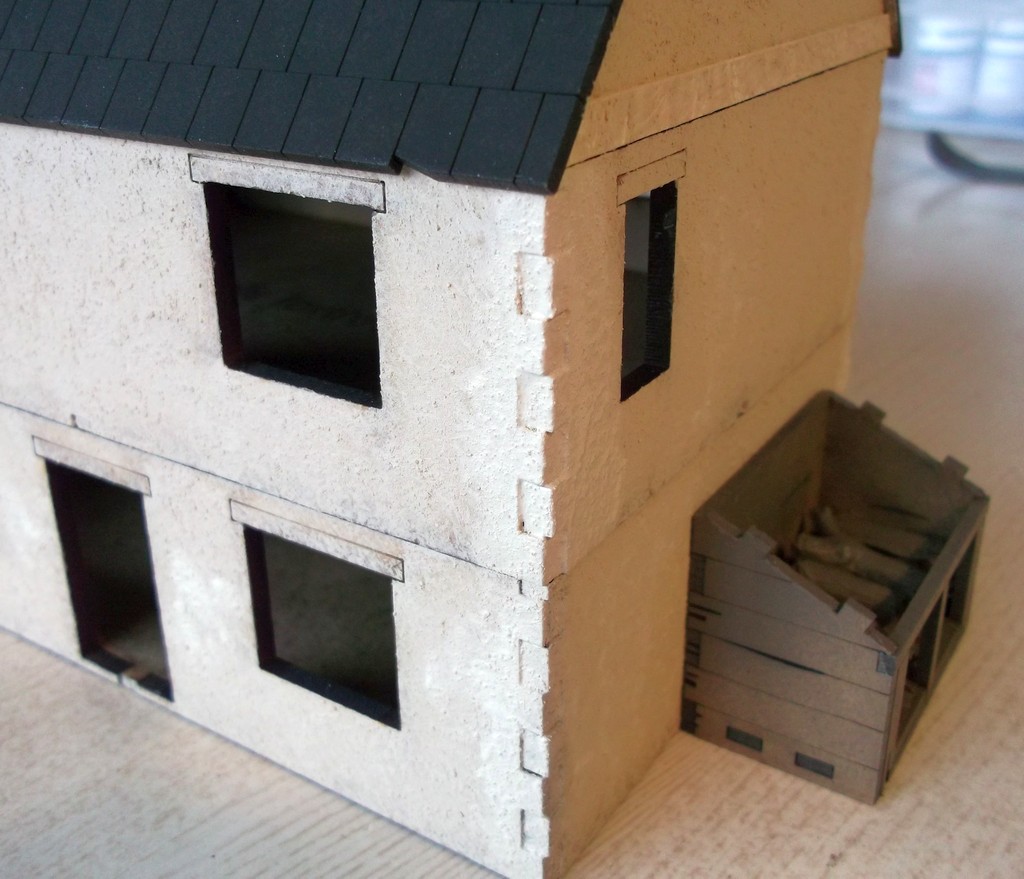
Tip - keep a cocktail stick or similar sharp item to hand whilst texturing as it comes in handy for removing any texture from the etching above the window frames.

You'll see that the dovetailed corners give the impression of stone blocks. You could enhance this by adding your own blocks made from small squares or rectangles of thin card (I may try this out on another building) but for now I'm happy with the standard finish.

The textured building ready for some paint!


Summary of tips
  • Use good quality glue as it will have minimal shrinkage, be stronger and dry clear.
  • Dry fit the components. My Father was a carpenter and always said "measure twice, cut once"... in this case dry fit twice, then glue once!
  • Check that you have all the bits (Colin is very good - you'll often have a few extras!)
  • Follow the assembly instructions - if they're supplied. Yes I know most of us are blokes but the instructions are supplied for a reason!
  • Use the website pictures as a reference if you're not sure of any part of the build.
  • Spray things like roof sections before building.
  • Use lego bricks as chimney pots.
  • Buy a small pot of magnolia textured paint - a good base as many buildings will be off white or grey.
  • Keep any textured paint away from the window/door apertures.
I hope that's been a useful 'how to' for MDF buildings. In the next installments I'll start to look at how to paint them, complete the assembly and add the finishing touches.

Thanks for reading!

New Releases: Eastern Front "Razed buildings 1 & 2"....the authentic smell of burnt wood comes free with every kit! September 21, 2015 09:17

Whilst doing research into the Eastern Front, I was moved by an image of standing chimneys and burnt out wooden homes. I have now released two models based on this research and proudly present "Razed House 1 & 2".

Razed 1 has steps up to the floor and a hole showing floor timbers and the ground beneath.

Razed 2 has the same footprint as "Rural House 1" so can be used as a replacement should the original take a hit.

Both models are a cost effective way of populating an Eastern Front table when combined with the intact buildings. These models would fit into Eastern European, Stalingrad and American Civil War layouts.

Please note: the burnt smell does wear off and sniffing war gaming  buildings is not recommended.


New release: "Wizard's Tower" September 14, 2015 11:09

 Inspired by the unusual snow shedding roof of the recently released "Hunter's lodge" I though that with a few "tweaks" this could be a good addition to the Charlie Foxtrot Models fantasy collection. The few tweaks became a major project.......

I had games like Frostgrave, Kings of War, Carnevale, Mordheim and Warhammer Fantasy Battles in mind throughout the design process. The stairs and baclcony are 35mm wide to fit the 30mm plastic curved edge bases as wel as the standard 20mm or 25mm square bases.

Packed with features (my favourite bit is the dungeon skylight window), this model is very versatile. Having a perfect square room means the balcony and windows can be placed facing 4 different directions.


New Releases: Smoke Markers and Roof Tiles September 7, 2015 11:59

Having played a recent game of Bolt Action and been hampered by smoke from a 2" mortar all game; I realised how I had previously underestimated how powerful smoke can be on the table top.

I have made 2 kits: 3" & 4" Smoke Markers. Each set contains 5 x 2mm MDF discs and sufficient new polyester fibre to make up five smoke markers. It is recommented that a contact or general purpose adhesive is used to glue the polyester to the MDF discs.

Due to demand, I have also increased the range of card "roof tiles". To support my range of 20mm 1:72 buildings, I have released A4 card roof tile sheets in 2 styles.

 To further support the Eastern Front 28mm range of models I have listed in the shop A4 card "Waney Edge" roof "planks". These planks may also be used to clad walls to change the look if multiple models of the same type are bought. 

On the workbench and hopefully ready for Colours this weekend is a new addition to the fantasy range. Look out for this release next week!


Wargames Soldiers & Strategy: Review September 4, 2015 12:36

Yes! My issue of Wargames Soldiers & Strategy arrived yesterday (no 80) and I was delighted to see that Charlie Foxtrot Models "L'Ecole" has been reviewed. I am so pleased with Guy Bower's (editor WS&S) positive comments.

It seems like a lot has happened since "L'Ecole" was a new release. The stables, shop back yards, 3 x 20mm buildings, the Bank de France and the Eastern Front collection were all released after "L'Ecole". I guess the lead-in time for a bi-monthly publication causes inevitable delays in getting news out. I would much rather recieve the magazine monthly!

On second thoughts, I would prefer to wait and have high quality content rather than "fluff" and more photos.


Buyers beware, this kit has a very large footprint and is really imposing on the table!


Bolt Action Tournament Exeter 30.8.15 August 31, 2015 14:14

A few pictures from yesterdays Bolt Action tournament in Exeter run by Kirton Games. (Thanks for putting on a well organised event guys). www.charliefoxtrotmodels.com had scenery on 5 tables. Thanks to the Kirton games chaps for allowing me to showcase my designs. A great day out, rolled dice, pushed the toys around and had 3 enjoyable games with 3 people I had not played before......good atmosphere and good time had by all. It was good to see old friends and manke new friends too. Just don't ask me how well I did. ......I only wish it was a doubles tournament so I could blame someone. I did not win the wooden spoon wich was a pity as I could have made that  into something!


Tutorial: Painting Wood Effects August 26, 2015 14:42

After the release of my first batch of Eastern Front, Eastern European / Russian buildings which are predominately natural wood, I recieved a number of requests on how I achieved the painting effect.

Please note......ENSURE EACH LAYER OF PAINT / WASH IS FULLY DRY before going onto the next step. This will avoid dragging up foundation layers of paint and "muddying" the colours.


In this brief tutorial I will take you through step-by-step on how I completed painting the prepared  "Hunter's Lodge" in just one hour.

Step 1: Assemble the kit according to the supplied instructions.

Step 2: Glue the waney edged cardboard tiles (supplied with the kit) to the roof. start at the bottom and work up towards the top. After each "plank" is glued coat with full strength PVA on the top to seal the cardboard. As you coat the PVA, it will start to dry, drag this along the length of the planks and this will provide grain texture when fully dry. Trim excess card with a craft knife when each side is dry.

Step 3: Using car primer, spray grey then overspray with Halfords Khaki matt paint.

Step 4: The hour's painting starts here! Using a wide brush, drybrush UPHILL at first to pick out the timber edges then along the planks with a light scrubbing motion (use an old brush for this). I used cheap Tan coloured acrylic from the Hobby shop called "Crafters Acrylic". Apply a lighter drybrush of Crafters Acrylic Bleached Sand (Bleached Bone would work just as well). At this stage the model will look too light and chalky.

Step 5: Apply a wash (I used Games Workshop Agrax Earthshade) to selected random wall planks, using the engraved lines as a guide. On the roof apply the wash towards the top of each plank to emphasise the depth of the planking. When applying washes in this manner, apply quickly and wipe any excess with a finger to blend. At this stage, it all looks too stark and stripey. This needs to be toned down to bring the colours together.

Step 6: With a very watery mix of medium brown acrylic (I used P3 Formula Bloodtracker Brown) liberally coat the whole model exept the light edges to the windows to retain their definition. As the paint drys, rub excess away with a finger, this action will reveal the lighter colours underneath. This rich brown wash unifies the colour and reduces the contrast yet provides depth.

Step 7: I watered down a very dark brown acrylic( in this example, I used Vallejo Charred Brown) to a milky consistency and selectively applied around the lower planks of the model, under the eaves, under the door hinges and window cills. A small amout of wash was also between the roof planks to give a little extra depth. I then used a pale blue to pick out the skylight frame followed by black on the door hinges and latch. A watery mix of medium green (in this case Vallejo Luftwaffe Green) was applied to areas to represent algae growing on shaded sections of the roof.

This mode l was complete in one hour. I did use a hairdryer to speed things up. For the other Eastern Front wooden buildings I painted them like a unit of troops and applied each process to each model in turn, when I got back to the first model it was dry enough to go onto the next stage.

Please do try this method on your Charlie Foxtrot Models builings. If you keep the paint thin and it does go wrong, it will be easy to overpaint and try again. Good luck.


New Release: Eastern Front "Hunter's Lodge" August 24, 2015 11:37

This unusual dwelling is found in the more remote areas of Central and Eastern Europe, used as a hunters lodge or mountaineers night stop.  The unusual roof design is so arranged to shed snow.

This style building may also be placed in small hamlets and compliments the Rural House 1 & 2 available in this shop.

The "Hunters Lodge" is 28mm 1:56 scale and is suited to Eastern European / Russian / Fantasy settings.

Thanks to Geoff Coe from Wellington for the inspirational images that led to this kit and Paul Buller from Truro for the painted Russian Black Tree models....featured here and instore.